


How to Set Up Your Second-Hand iPhone Without Losing Data

16/10/2024

8 Mins
How to Set Up Your Second-Hand iPhone Without Losing Data
Just got your hands on your new device and worried about losing your precious data during set up of Your Second-Hand iPhone? You’re not alone. Setting up a second-hand device might seem like a daunting task, but it doesn’t have to be. With this guide, we’ll walk you through each step, ensuring you keep hold of all your contacts, photos, apps, and more. Whether you’re moving from an old iPhone or switching from another brand, we’ll make sure your transition is seamless. Forget the stress and say hello to your second-hand iPhone experience without any data drama.
Preparing for the Setup
Getting a pre-owned iPhone is exciting, but the process of setting it up can feel a bit overwhelming. A smooth transition means holding onto the memories in your old device while moving to your shiny new one without stress. Let’s make sure you’re ready for every step ahead. Before we dive into the setup process, let’s get prepped.
Backup Your Old iPhone
Backing up your current device ensures that you don’t lose important photos, messages, or app data. Thankfully, Apple offers a few straightforward ways to back up your iPhone:
- iCloud Backup:
- Simply go to Settings > [Your Name] > iCloud > iCloud Backup and select Back Up Now. Make sure you’re connected to Wi-Fi and have enough iCloud storage.
- iTunes Backup (Windows PC):
- Connect your iPhone to your computer with a USB cable.
- Open iTunes and select your device. Under the Backups section, choose This Computer and click Back Up Now.
- Finder Backup (macOS Catalina or later):
- Connect your iPhone to your Mac using a USB cable.
- Open the Finder and select your device from the sidebar. Choose Back Up Now.
For more detailed steps, visit Apple’s guide on how to backup your iPhone with iCloud, iTunes, and Finder.

Photo by Vlada Karpovich
Check Compatibility
Before the set up of your Second-Hand iPhone, check if it’s compatible with the latest iOS version. This ensures you get all the latest features and security updates. Here’s a list of iPhone models compatible with iOS 18:
- iPhone 16, iPhone 16 Plus, iPhone 16 Pro, iPhone 16 Pro Max
- iPhone 15 series
- iPhone 14 series
- iPhone 13 series
- iPhone 12 series
- iPhone 11 series
- iPhone XR, XS, XS Max
Make sure you’re not trying to install updates on an unsupported device.
Gather Required Information
Now, ensure you have all essential information and accessories at hand to make the setup process smooth as silk:
- Apple ID and Password: The key to accessing Apple’s services, including App Store and iCloud.
- Passcodes: For unlocking screen time and other apps, if relevant.
- Accessories: Have a charger, Lightning cable, and any other necessary accessories ready.
Remember, preparation is everything. Having these details ready can turn your setup day from a chaos to a piece of cake.
How to Setting Up Your Pre-Owned iPhone
Getting a Second-hand iPhone is an exciting way to enjoy Apple’s premium technology at a more affordable price. However, setting it up can feel like a mysterious puzzle box at first. Let’s walk through the process together so you can unlock its potential smoothly.
Powering On and Initial Setup of Your Second-hand iPhones
 Photo by Artem Podrez
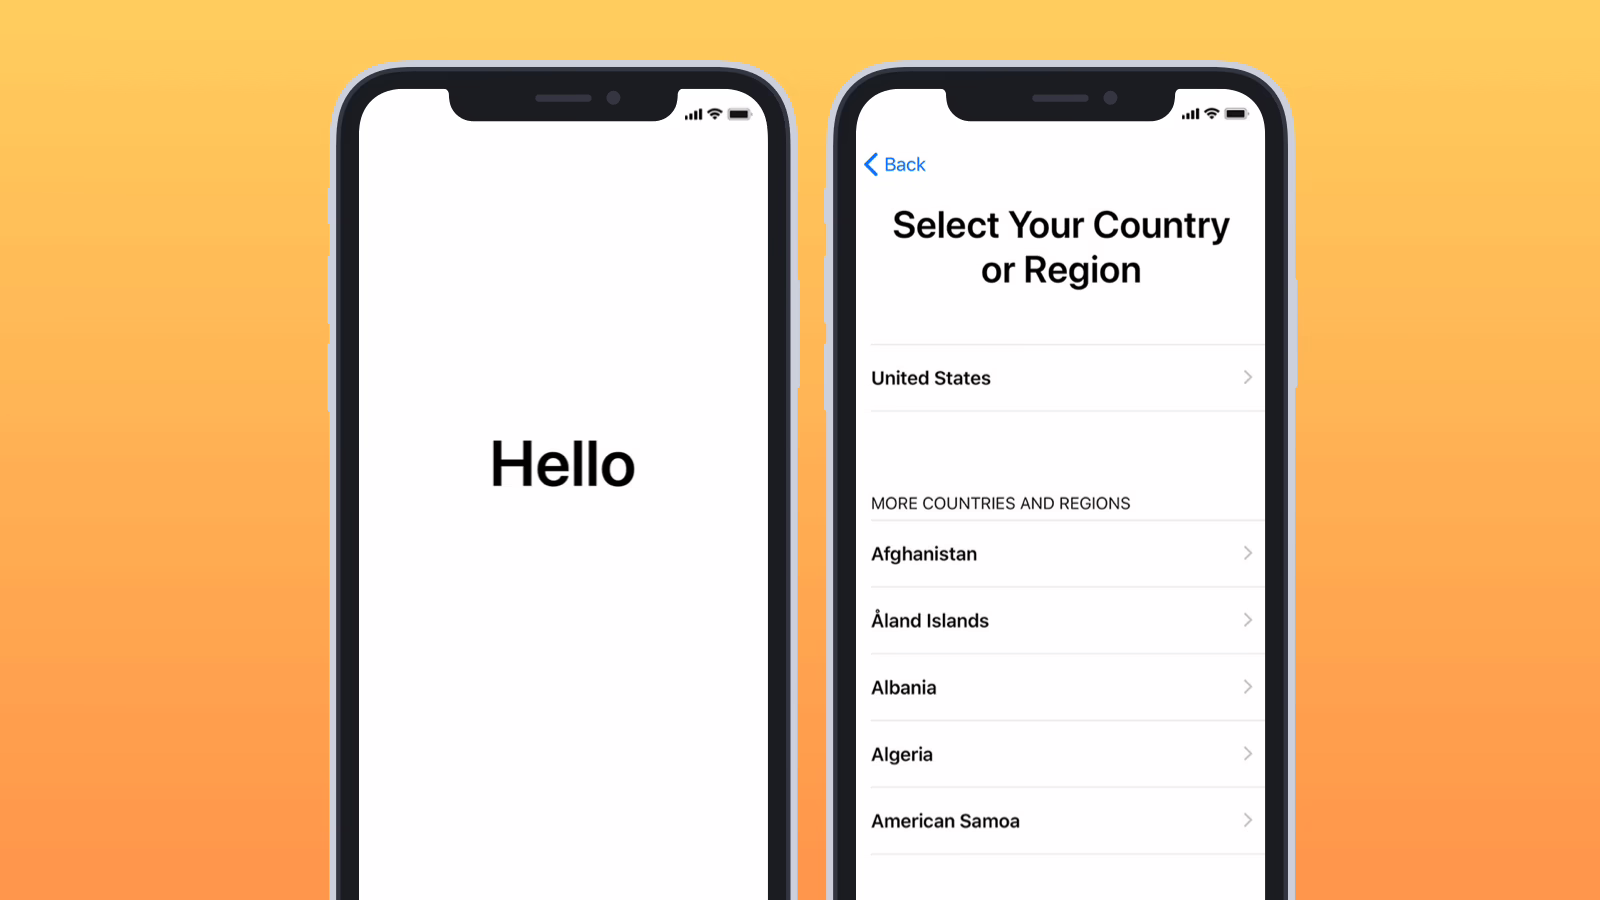
To get started, you’ll need to power on your iPhone. Hold down the side button until you see the Apple logo appear. Once it’s on, follow these steps to get through the initial setup:
- Language Selection: Choose your preferred language from the list.
- Region Settings: Select your country or region.
- Wi-Fi Connection: Connect to a Wi-Fi network to proceed.
- Data & Privacy: Click “Continue” to understand how Apple handles your data.
This is the first step in getting your iPhone ready to be personalised by you.
Using Quick Start
If you have another iOS device handy, the Quick Start feature makes life a breeze. Place both devices near each other, and follow the prompts:
- Your new iPhone will display a screen that offers to use your Apple ID to set up the new device.
- An animation will appear. Hold your other device over the new iPhone and centre the animation in the viewfinder.
- Follow the on-screen instructions to carry on with the setup.
Quick Start is like having a friendly assistant who knows exactly what you need. More details can be found on Apple’s support page.
Restoring from Backup
Restoring your previous data ensures you keep all your favourite photos, apps, and settings. Here’s how to do it, whether you’re using iCloud or iTunes:
Restoring from iCloud:
- On the “Apps & Data” screen, choose “Restore from iCloud Backup”.
- Log in with your Apple ID.
- Choose the most recent backup, and let your iPhone do the rest.
Restoring from iTunes:
- Connect your iPhone to the computer with iTunes.
- Select your device from the list and click “Restore Backup”.
- Pick the most relevant backup to restore your data.
These steps make sure your new iPhone feels just like home. Check out more detailed instructions on Apple’s backup restoration guide.
By following these steps, you’ll be ready to enjoy your pre-owned iPhone without any hassle. It’s like giving the phone a fresh start while pausing your life’s playlist right where it left off.
Transferring Data Manually
When setting up your second-hand iPhone, transferring data manually can be a practical solution. Sometimes, the automatic methods might not cut it. Whether it’s due to personal preference or technical hiccups, knowing how to do it yourself can be a lifesaver. Let’s explore a few options for moving data without losing a precious byte.
Using Third-Party Apps
Sometimes the direct route isn’t the best one, so third-party apps can be a great ally in transferring data to your new device. These apps are like the trusty sidekick that makes sure everything gets where it needs to be, without any fuss.
- Copy My Data: This app helps you move contacts, photos, and calendar entries over a WiFi network with just a few taps. It’s straightforward and pretty much does it all for you.
- Smart Transfer App: Known for its speed, this app swiftly moves your contacts, text messages, music, and calendar entries to the new phone with a user-friendly interface.
- Syncios: This is the app for those who want to transfer media like music, videos, and e-books effortlessly. It supports transferring from an iPhone to other devices, including Androids and PCs.
These apps ensure that your treasured memories and essential data aren’t lost in the shuffle. Just download the one that fits your needs and follow the simple instructions provided.
Manual Data Entry
Sometimes, the digital highway doesn’t have the lanes you need, and you have to take the scenic route. That’s where manual data entry comes in. But before you dive in, let’s examine when it’s necessary and how to tackle it without hitting too many bumps.
Manual data entry is often needed when:
- Data is highly sensitive: You’ll want to ensure it’s transferred accurately and securely.
- Data formats differ: Some pieces of your information might not be compatible with direct transfers.
- Small quantities: If the data is minimal, manual entry might just be quicker and easier.
Risks and Tips:
Entering your data manually isn’t without its pitfalls. Watch out for these possible hiccups:
- Human Error: Mistakes happen—double-check for typos or omissions.
- Time-Consuming: Be prepared to spend some time on this, especially with larger data sets.
- Security Concerns: Handle sensitive information carefully to avoid any mishaps.
For a deeper understanding of manual data entry’s pros and cons, check out this insightful article on the challenges and solutions.
If manual entry is your path, take it step by step. Double-check your work, and ensure your new device is as organised and up-to-date as your old one. After all, it’s like moving into a new home – you want everything in its rightful place.
Final Steps After Setup
Congratulations! Now you have successfully set up your second-hand iPhone. But before you dive into using your new device, there are a few critical steps to ensure everything is running smoothly and securely. These final touches will help ensure your iPhone is optimised for performance, security, and functionality.
Update iOS and Apps
Keeping your iPhone’s operating system and apps up-to-date is crucial. Why is updating so important? For starters, updates often come with security patches that protect your device from vulnerabilities. These patches are like the lock on your front door, keeping unwanted visitors out. Plus, updates can improve performance, fix bugs, and sometimes include new features that enhance user experience.
- Improved Security: Updating your iOS regularly is crucial to keep your device secure from malicious threats.
- Bug Fixes and Performance: Updates often include fixes that can make your iPhone run smoother and faster.
- New Features: With every update, you might get exciting new features to try out.
Remember to go to Settings > General > Software Update to install the latest iOS. Also, ensure your apps are updated by opening the App Store and tapping on your profile picture to update them all at once.
Setting Up Security Features
Your iPhone is like having a safe in your pocket, provided it’s set up correctly. Setting up security features is a must to protect your personal data. One way to secure your phone is by enabling Face ID or Touch ID. These biometric security features let you unlock your device with just a glance or a touch.
- Face ID: Head to Apple’s guide to learn how to set it up for face recognition.
- Touch ID: You can set up Touch ID to unlock your phone with your fingerprint by following these steps.
Besides these, always use strong passwords and enable two-factor authentication. Think of it as having another shield that guards your personal data.
Test Data and Functionality
Now that you have set up your Second-Hand iPhone and it’s fully secure, it’s time to ensure everything is functioning correctly. Start by checking if all your data has been transferred correctly. Look for your contacts, photos, apps, and messages. Missing anything? You might need to perform another backup or sync.
Don’t forget to test the functionality of hardware features as well. Make sure:
- The camera is working smoothly.
- The speakers and the microphone are clear.
- The screen responds well to touch.
Running a quick diagnostic test can give you confidence in your device’s functionality. It’s like taking a new car for a spin to make sure everything’s in working order.
With these steps complete, you’re all set to enjoy your newly configured iPhone with peace of mind and full operational capacity.
 Photo by Ylanite Koppens
Conclusion
The process to Set up your second-hand iPhone without losing data might seem challenging, but with the right steps, it’s straightforward. Always start by backing up your old device, either through iCloud or a computer. This ensures that your contacts, photos, and apps remain intact. Using tools like Quick Start helps make the transfer seamless; just have both devices handy and connected. Remember to keep your devices charged throughout the entire process.
Don’t rush. Take your time to double-check settings and verify your data transfer.
Now, it’s over to you. Give it a go and enjoy your ‘new’ iPhone with all your treasured data right where it should be. If you have any tips or face any hurdles, share them in the comments below. Your insights might also help someone else.
Browse our huge range of Used iPhones online now to get the right deal for you!
")


