
How to Repair Broken iPhone Screen
30/04/2026
18 Mins
You can repair a broken iPhone screen yourself, but it only makes sense if the phone still works properly underneath, you’re comfortable opening electronics, and you accept the risk of damaging Face ID, cables, seals, or your data. If the phone is older, bent, water-damaged, or already nearing replacement time, professional repair or buying a certified refurbished iPhone is often the better call.
Quick Steps
- Back up your iPhone
- Power off and remove SIM tray
- Heat the screen edges to soften adhesive
- Lift the screen carefully using a suction tool
- Disconnect the battery and display cables
- Replace the screen and transfer components
- Test before sealing the phone
Quick Verdict
You drop your iPhone on the pavement outside the station, the glass is spidered, and by lunch you are already weighing three choices. Fit a screen yourself, pay a shop, or stop spending on an ageing handset and move everything to your new iPhone instead. For UK buyers, that decision usually comes down to risk, total cost, and how much life the phone realistically has left.
DIY screen repair can be good value on the right phone. It starts to look expensive once you count the hidden costs of a failed attempt: a damaged Face ID flex, poor quality replacement panel, loss of water resistance, extra tools, wasted adhesive, and then a second repair bill when the phone still needs professional work. I see that often enough to treat DIY as a value option only when the device is older, the damage is limited to the screen, and the owner is comfortable working on small connectors and adhesives.
A quick model comparison makes the trade-offs clearer:
- iPhone 11: One of the more sensible DIY candidates if the phone is otherwise healthy. Parts are easier to justify, but careless cable handling still turns a simple job into a costly one.
- iPhone 13: Often the tipping point. A proper repair can still make sense, but the combined cost of parts, tools, and risk starts to compete with the value of a warrantied refurbished replacement from a UK seller.
- iPhone 14 or 15: Usually better handled by a professional unless you already repair phones and have the right setup for testing and resealing.
If you want a broad sense of prices and routes before deciding, it helps to understand screen repair options first.
Your Immediate Questions Answered
Anyone searching how to repair broken iPhone screen wants the same answer. Can I fix it myself, should I pay someone, or is it smarter to replace the phone? The honest answer is that all three can be right, depending on the age of the device, the type of damage, and how much risk you’re willing to take.
Check what is actually broken
Start with a simple test before you buy parts.
- Glass only: The display still shows a normal image, touch works, and there are no coloured lines or black blotches
- Display damage: The screen has dead areas, flicker, black ink-like patches, or no image at all
- Frame damage: The phone doesn’t sit flat, corners are crushed, or the screen is lifting unevenly
- Possible internal damage: Cameras fail, Face ID stops working, or the phone restarts after the drop
If it’s only cracked glass on the front and the rest of the phone behaves normally, DIY is possible. If the image is distorted or the chassis is bent, screen replacement may not be the whole job.
Practical rule: If you can’t tell whether the damage is only the screen, don’t order parts yet.
Back up the phone before you touch a screw
Back up first. A screen repair can go smoothly, but if a cable tears, the battery is shorted, or the phone stops booting, you may lose access to photos, messages, banking apps, and two-factor logins.
Use one of these exact paths:
- iCloud backup:
Settings > [your name] > iCloud > iCloud Backup - Computer backup on Mac or PC: Connect the iPhone, open Finder or Apple Devices/iTunes, select the iPhone, then choose Back Up Now
If the phone is too damaged to trust long term and you decide replacement makes more sense, this guide on how to move everything to your new iPhone is worth bookmarking.
Understand the warranty trade-off
In the UK, cracked screens make up about 49% of all iPhone damage incidents, and official repair prices can run from £169 to £329, which is one reason many people delay fixing them, according to SquareTrade’s iPhone repair data.
That price gap is exactly why DIY is tempting. But once you open the phone yourself, any remaining warranty position becomes more complicated. On a relatively recent device, that’s often the biggest hidden cost.
First Steps Before You Start Any Repair
A broken screen isn’t always just a broken screen. Before ordering a kit, check whether the phone is still structurally sound and whether a repair is worth doing at all.
Check what is actually broken
Look closely in good light and test the mobile without removing anything.
Try these checks:
- Access the phone and test touch across the full display, including top corners and bottom edge.
- Open the Camera app and switch between front and rear cameras.
- Raise brightness using
Settings > Display & Brightnessto see if the panel shows blotches, flicker, or colour shift. - Test Face ID in
Settings > Face ID & Passcode. - Check the frame by placing the iPhone on a flat table.
If the image is clear and touch works everywhere, you may only need a screen assembly. If there are lines, no image, random touches, or the frame is bent, the repair gets riskier very quickly.
A customer once brought in an iPhone 13 with “just a cracked screen”. The actual issue was a slight twist in the housing. A new screen would have sat under stress from the start, and that’s the sort of repair that often comes back.
Back up the phone before you touch anything
This is not optional. Even a straightforward screen job can go wrong, and the risk isn’t only the screen. It can be data access, Face ID, charging behaviour, or boot failure after reassembly.
Use one of these backup methods first:
- To iCloud:
Settings > [your name] > iCloud > iCloud Backup > Back Up Now - To a Mac: Connect the iPhone, open Finder, select the device, then choose Back Up Now
- To a Windows PC: Connect the iPhone, open Apple Devices or iTunes, select the device, then choose Back Up Now
If the repair fails and you decide to retire the handset instead, it’s much easier to restore to another phone when you’ve already saved everything.
A cracked screen is stressful. Losing your photos because you skipped the backup is worse.
Prepare the phone properly
Before opening the device:
- Power it off fully
- Remove the SIM tray
- Charge the battery enough for testing later, but don’t keep the phone on charge while working
- Set up a clean workspace with a screw mat, bright light, and enough room to lay parts out in order
- Work slowly if the glass is shedding. Tiny fragments travel everywhere
A cluttered kitchen table is where a lot of repairs go sideways. Missing one screw position or mixing lengths can damage the board during reassembly.
Understand the warranty trade-off
The money side matters. Many people repair a screen because the official route feels expensive. That’s understandable. But DIY can void whatever protection or goodwill position you still had left on the device, and that matters more on newer models.
A few practical points:
- Newer iPhones: Usually worth preserving proper repair options
- Older iPhones: Easier to justify DIY if the phone is already outside meaningful coverage
- Used or refurbished phones: Check the seller’s terms before opening the handset yourself
- Third-party repairs: These can also affect later support, depending on the repair and the parts used
Decide whether the phone is worth repairing
Before spending money on a screen, ask yourself:
- Is the battery already poor?
- Is the phone old enough that another fault is likely soon?
- Is it your main work mobile?
- Would a failed repair leave you without access to banking, travel tickets, or authenticator apps?
If the answer to several of those is yes, stepping away from DIY is often the more sensible choice.
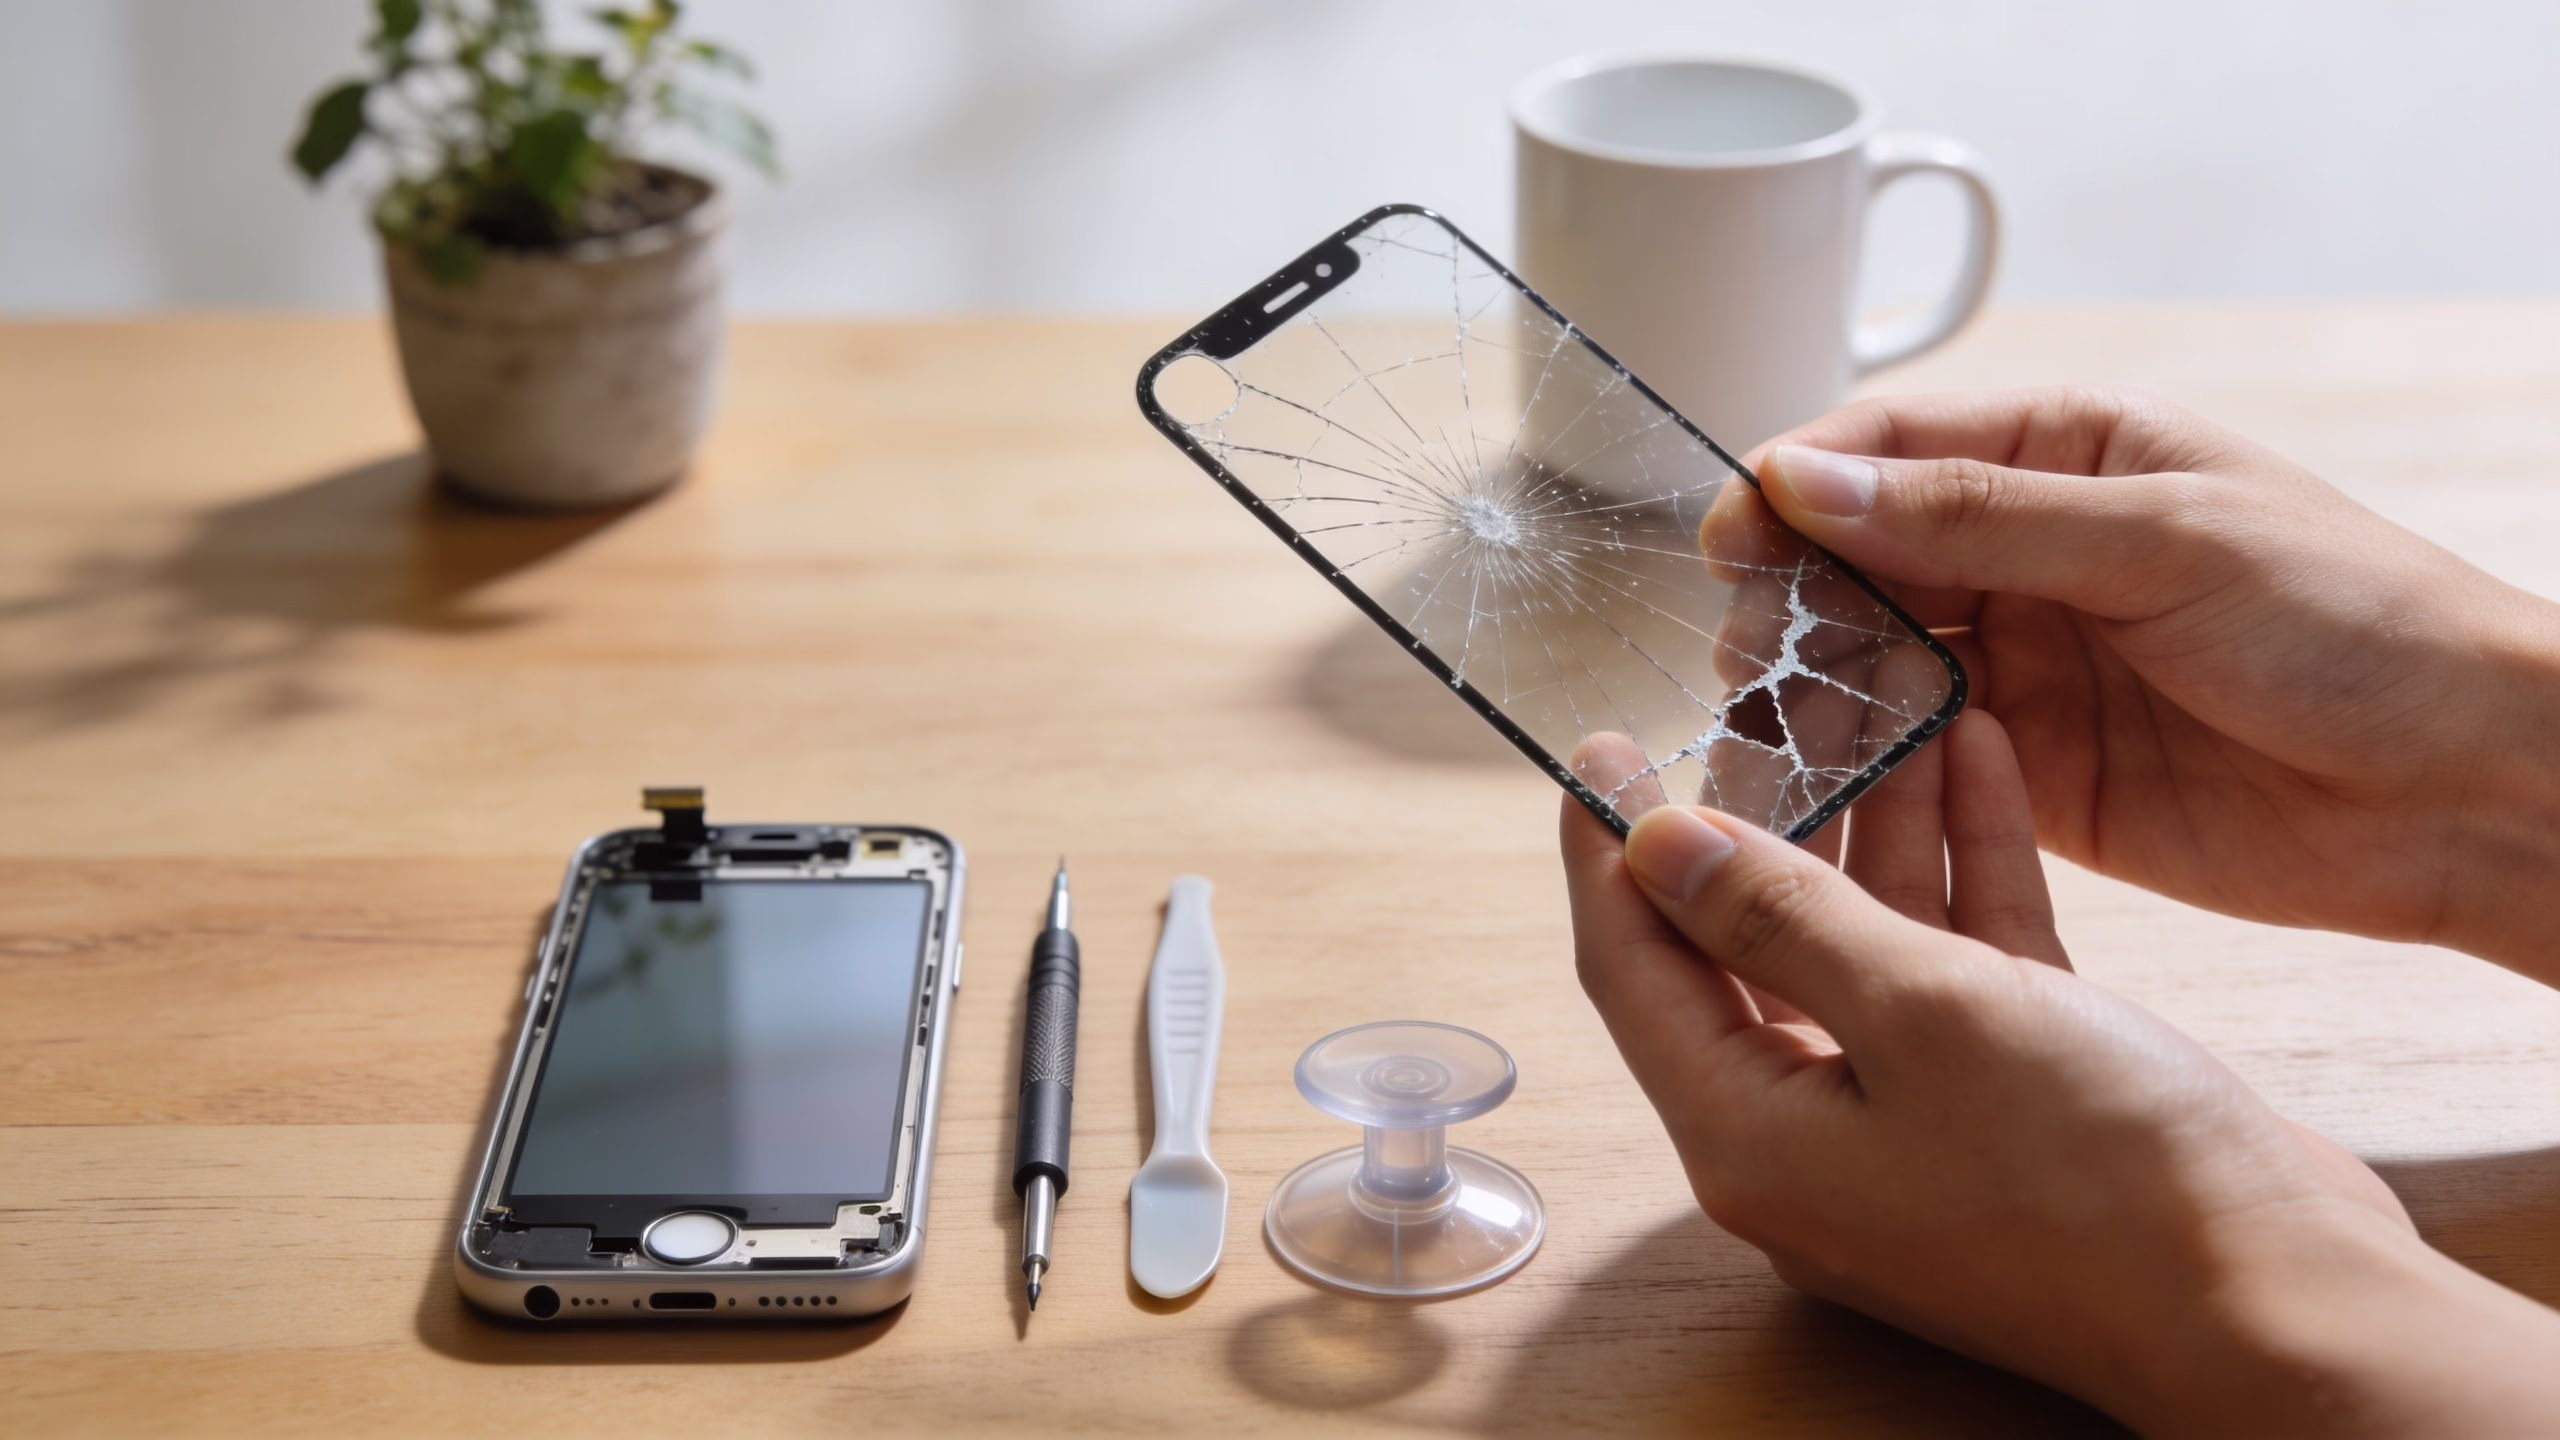
The Complete DIY Guide to Repair a Broken iPhone Screen
At 9pm, your iPhone slips from your hand, lands face-down, and the screen spiderwebs across the top corner. By 9:30, you are comparing a £25 screen kit, a £120 repair quote, and the price of a replacement phone. That is the primary decision point for UK buyers. The screen is only part of the cost. Time without your phone, the chance of losing Face ID, and the risk of turning a working handset into a lower-value parts device all count too.

I see the same pattern in the workshop. Someone tries to save money on a home screen repair, the display comes on, but a sensor cable tears during transfer or the new panel has poor touch response. The first spend looked low. The final bill was not.
A DIY screen repair can still make sense. Older iPhones with modest resale value are the usual candidates. Newer models are less forgiving, replacement parts cost more, and one mistake can erase the saving you were aiming for. If you are weighing all three routes, this refurbished iPhone vs repair guide is a useful comparison because it frames repair cost against the price of a tested, warrantied replacement from a UK seller.
The repair method itself is straightforward on paper. As outlined in Dash Repairs’ step-by-step iPhone screen repair guide, the usual process is controlled heat around 60 to 70°C, careful separation with suction and picks, battery disconnection before display cables, and transfer of original parts such as the earpiece and sensor assembly. The same guide also notes that first-time repairs fail more often, especially where adhesive and display cables are handled badly.
DIY screen repair only works if the phone is a good candidate
Before picking up tools, decide whether the job is sensible.
DIY is usually more reasonable if:
- the phone is already out of warranty
- it is an older model
- Face ID or perfect cosmetic finish is not a deal-breaker
- you can afford to be without the phone if the repair stalls
- the phone is worth less than the cost of a premium repair
DIY is usually a poor bet if:
- it is your daily work phone
- you rely on it for banking apps, 2FA, travel tickets, or business calls
- the model is recent and still holds good resale value
- the battery is weak and the screen is not the only problem
- you would end up paying for a professional rescue repair if anything goes wrong
That last point matters. A failed DIY attempt often means you buy the screen, spend your evening on the job, then still pay a technician to sort out torn cables, missing screws, poor adhesive fit, or a bad-quality panel. At that stage, the cheap route has gone.
Tools and parts that are actually worth buying
A proper setup does not need to be expensive, but it does need to be correct.
Use:
- Pentalobe screwdriver for the bottom screws
- Phillips #000 or Y-type drivers depending on iPhone model
- Plastic opening picks and pry tools
- Suction cup or clamp-style opener
- Fine tweezers
- A screw mat or labelled tray
- Pre-cut adhesive
- A low, controlled heat source
Avoid using kitchen knives, random jeweller’s screwdrivers, or a hairdryer on full blast. Those are common shortcuts behind stripped screws, damaged frames, and overheated OLED panels.
Parts quality makes a visible difference. A cheap screen may fit, then disappoint on brightness, colour temperature, touch latency, or battery drain. On OLED models, low-grade panels are obvious straight away. If your phone is an iPhone 12 or newer, poor screen quality stands out more sharply than it did on older LCD devices.
The six-step repair process
Step 1 Power down and prepare the phone
Turn the iPhone off fully. Remove the SIM tray. If the glass is breaking away, tape over the display first so loose fragments do not drop inside during opening.
Lay out a screw map before removing anything. Screw length errors are one of the easiest ways to cause avoidable board damage during reassembly.
Step 2 Soften the adhesive with controlled heat
Apply low, even heat around the display edge. The guide cited earlier uses roughly 60 to 70°C for about 90 seconds to soften the seal without overheating nearby components.
Place a suction cup near the lower edge and lift gently to create a small gap. Insert a plastic pick into the gap and work around the frame. Keep the pick shallow. Internal cables sit closer than many first-time repairers expect.
Step 3 Open the display with cable position in mind
Lift the screen slowly and stop as soon as you feel resistance change. Different models hinge differently, but the rule stays the same. Do not pull the display up and away until you know where the flex cables are routed.
If the phone resists, add heat and try again. Force is what tears cables.
Step 4 Disconnect the battery before the display cables
Remove the bracket screws, lift the shield, and disconnect the battery first. Then disconnect the display and sensor flexes.
This order reduces the chance of shorting something while your tools are inside the phone. It also gives you a safer working setup while you move components to the new screen.
Step 5 Transfer the original parts carefully
Many DIY jobs become expensive. On a lot of iPhones, the earpiece speaker and front sensor assembly must be transferred from the original screen to the replacement.
Take extra care with:
- Earpiece speaker assembly
- Proximity and ambient light sensor components
- Brackets attached to the front sensor area
Damage here can mean losing Face ID or affecting call functions. The phone may still switch on and look repaired, but its value drops and some features do not return.
Step 6 Test everything before final sealing
Reconnect the main display cables and battery, then power the phone on before fitting the new adhesive permanently.
Check:
- Touch across the full screen
- Display brightness and colour
- Front earpiece sound
- Front camera
- Face ID
- Auto-brightness
- Side buttons and volume buttons
If anything is wrong, reopen and diagnose it before sealing the phone. Closing it up too early is one of the costliest mistakes because you end up repeating the risky part of the job.
Model-specific realities
Some iPhones are friendlier to DIY than others.
The practical trade-off is simple. If you repair an older iPhone successfully, you can save decent money. If you fail on a newer one, the hidden cost can be the screen kit, extra tools, lost features, a follow-up repair charge, and reduced resale value.
That is why I do not tell every customer to repair a broken iPhone screen at home. Some should. Some should book a repair. Some are better off putting that money into a warrantied refurbished replacement instead.
Common DIY Mistakes and How to Avoid Them
A customer brought in an iPhone 12 after a home screen replacement. The new display lit up, touch worked, and the job looked tidy from the outside. But Face ID was gone permanently because the front sensor cable had torn during transfer. That’s the hardest kind of DIY result. The phone feels nearly fixed, but one small mistake has changed the device for good.

The mistakes I see most often
Some errors are mechanical. Others are judgement calls.
The most common ones are:
- Stripped screws: Tiny screws need the correct bit and steady downward pressure
- Torn flex cables: Usually caused by lifting the screen too far, too early
- Poor adhesive fitting: The phone closes, but dust gets in and the seal is compromised
- Skipped component transfer: The display works, but sensors or speaker behaviour don’t
- No test before final seal: The phone is glued shut, then a touch dead zone appears
These aren’t dramatic workshop disasters. They’re ordinary mistakes from people trying to move too fast.
Cheap parts create expensive problems
A lot of repair frustration comes from the part itself, not the person fitting it. In the UK, mobile repair disputes have risen by 28%, with 62% involving iPhones, and one of the biggest issues is poor-quality replacement screens. The same source says 70% of high-street repairs use untested parts that can fail within six months, causing problems such as ghost screens and colour distortion, according to this video-cited summary of the UK repair dispute trend.
That lines up with what customers describe at the counter. The phone comes back on, but the screen feels wrong. Touch lags. Whites look warm or dirty. Brightness drops outdoors. None of that feels like a proper fix.
If you want a broader view of the risks before opening a used handset, this guide on how to fix a refurbished iPhone is useful.
A screen that “works” isn’t always a screen you’ll want to live with.
When to stop and hand it over
Use this decision framework if you’re halfway through and losing confidence.
The biggest trap is sunk-cost thinking. People buy the part, start the job, then keep pushing because they’ve already committed. That’s how a manageable repair turns into a costly recovery.
When to Choose Professional Repair Instead
Some phones are poor DIY candidates. If there’s water exposure, a bent frame, a totally black display, or obvious internal symptoms after the drop, professional repair is the sensible route.

That’s especially true when the phone is your daily driver. If you rely on it for banking, work logins, travel, and family communication, “I’ll have a go” stops being a harmless experiment.
Signs your phone needs more than a screen
Step back from DIY if you notice any of these:
- The frame is bent or twisted
- The screen is black with no reliable image
- There are vertical lines or spreading dark patches
- The charging port area shows moisture or corrosion
- The back glass or housing is also damaged
- The phone reboots after the drop
- Face ID or cameras already stopped working
Those signs often point to multiple issues, not just front glass damage.
What a proper repair shop should do
A quality repair service doesn’t just swap a panel and hope for the best. It should inspect the phone, confirm the display fault, transfer the original Face ID bracket correctly, and test touch and colour afterwards.
The professional benchmark described in Fix My PC Store’s repair guide includes diagnostics, full teardown, correct transfer of the original Face ID bracket, and post-repair testing for touch accuracy and colour calibration. That source puts screen-only success rates at over 90%, while noting results drop when there’s prior water damage or other complications.
A decent shop should also answer basic questions without getting defensive:
- What grade of screen are you fitting?
- Will Face ID and auto-brightness be tested?
- What warranty do you give on the repair?
- What happens if the phone has hidden damage once opened?
Ask how the phone is tested after repair. If the answer is vague, keep looking.
Apple versus an independent repairer
Apple is usually the cleanest option if the phone is newer and you want the most straightforward support path. An independent repairer can still be a very good choice if they’re transparent about parts, testing, and warranty.
A simple way to understand it:
If you’re stuck between repairing an ageing phone and replacing it, this refurbished iPhone vs repair guide helps frame the decision properly.
The Smart Alternative Buying a Certified Refurbished iPhone
A cracked screen on an older iPhone creates a different kind of decision. The screen is the obvious fault, but it is rarely the only ageing part. I see this a lot with phones that already have a tired battery, a dented frame, weak charge port tension, or signs of an earlier repair.
That is where people spend money twice. First on the screen, then on the next fault that shows up a week or a month later.
When replacement makes more financial sense
If your iPhone is still in good shape overall, repair can be sensible. If it is already showing its age, screen repair can turn into false economy.
A simple example. You fit a new display to an older handset and the job goes well. You still own the same phone with the same battery health, the same water resistance concerns, and the same chance of another component failing soon. If the phone is your daily device for banking, work apps, travel, and photos, that gamble matters.
DIY looks cheaper on paper, but the hidden costs are what catch people out in the UK. A failed repair can leave you buying a second screen, replacing tools you bent or damaged, paying for a rescue repair, or having to replace the phone anyway. Then there is the time cost. An evening job can easily become a lost weekend if a screw strips, a cable tears, or the phone will not boot properly after reassembly.
DIY, repair shop, or refurbished
This is the comparison I usually give customers.
The key comparison is not just repair bill versus replacement price. It is repair bill plus risk versus replacement value with a warranty.
That is why refurbished often wins on older iPhones. You stop putting money into a phone that may need a battery, charging port, or camera fix next. You also get a cleaner starting point.
What you actually get from a certified refurbished phone
A properly refurbished iPhone from a UK seller is not just a used phone with a wipe and a charger cable. The good ones are tested, graded accurately, battery checked, and sold with a warranty that gives you a clear route if something is wrong after purchase.
That matters more than people expect. After a DIY repair goes badly, there is usually no fallback except spending more. With a warrantied refurbished phone, the risk is easier to contain.
For buyers comparing repair against replacement, the practical route is often to buy refurbished iPhones and keep the broken handset only if it still has trade-in or parts value.
Quick answers people ask at this stage
- Is refurbished a better choice than repairing a smashed older iPhone? Often, yes. It usually makes more sense once the phone already has battery wear or other faults.
- Is DIY ever still worth it? Yes, if you already have the tools, accept the risk, and the phone is valuable enough to justify the attempt.
- Does refurbished reduce the hassle factor? Yes. You avoid sourcing parts, opening the phone, testing your own work, and dealing with a failed first attempt.
- What is the biggest hidden DIY cost? Having to pay for both the failed repair and the replacement phone. That is the scenario people underestimate most.
Frequently Asked Questions
Can I still use my iPhone if only the outer glass is cracked
Yes, but it’s not a great long-term plan. Cracks spread, touch can worsen, and the phone becomes more vulnerable to moisture and internal contamination.
Will a DIY screen repair keep True Tone and Face ID
Sometimes, but only if the original components are transferred correctly and nothing in that front assembly is damaged during the job. This is one of the main reasons first-time repairs go wrong.
Is a broken screen always worth repairing
No. If the phone is already older, has poor battery life, or may need more work soon, repair can be false economy.
Should I choose Apple or a local repair shop
Apple makes more sense for newer handsets and anyone who wants the cleanest support route. A good independent shop can be excellent for older models, but only if they’re clear about parts, testing, and warranty.
What should I do first if my screen is badly smashed
Back it up immediately if it still powers on. Then stop using it if glass is shedding or the display is glitching, and decide whether you’re dealing with a simple screen issue or wider damage.
If you’re weighing up repair against replacement, or you want a dependable upgrade without the risk of opening your current phone, Used Mobiles 4 U is a practical place to compare certified refurbished options and get straightforward advice.
Written by James Waterston, 24 years in the mobile phone industry from customer service through to Sales Director of a global repair and recycling company. Now running Used Mobiles 4 U for over 8 years.
LinkedIn:
James Waterston on LinkedIn
Looking for a refurbished phone?
Shop professionally tested refurbished iPhones and Samsung phones with 18 month warranty, 30 day returns and free UK delivery.
Browse Refurbished Phones")


